First Uninstall Windows 10 Latest updates
After that follow the above procedures
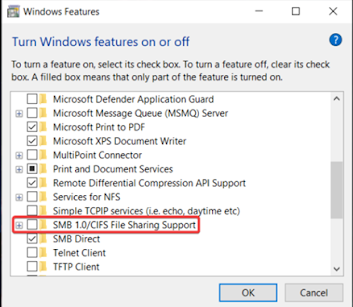
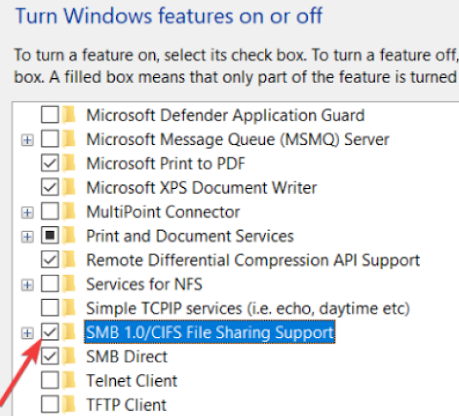
Enable SMB V1.0
Open Search, type Windows Feature and click to open Turn Windows
features on or off
. 
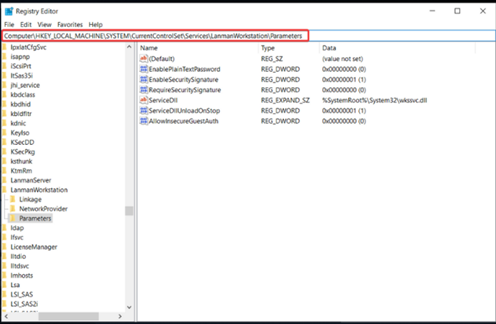
Change value for AllowInsecureGuestAuth
1.
Press the Windows + R keys to open the run box.
2. Type regedit and click on OK.
Computer\HKEY_LOCAL_MACHINE\SYSTEM\CurrentControlSet\Servi
ces\LanmanWorkstation\Parameters
4.
Locate AllowInsecureGuestAuth
5.
Right-click on it and select Modify
6.
Change the value to 1 from
0.
7.
Click on OK.
5. Enable advanced sharing
1.
Go to your Local
disk (C:),
right-click on it and select Properties
3.
Go to Advanced
sharing
5.
Click on Apply
then OK to save changes
It is pretty common
to encounter this error if the sharing property isn’t
enabled. For
computers to be able to send and receive files and data, you
need
to make sure your device is able to share its folders.
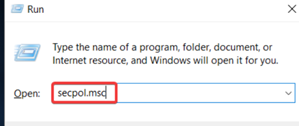
6. Change Network Security settings
1.
Press Windows + R keys, type secpol.msc
in the
run box and click on
OK.
2.
Select Local
Policies from
the left pane.
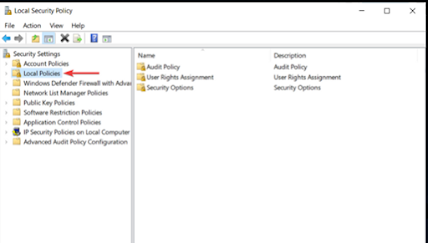
3.
Double click on Security Options from the right pane.
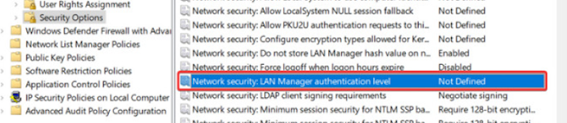
4. Locate Network security: LAN Manager authentication level and
double
click it.
5. From the
drop-down menu choose Send LM & NTLM-use
NTLMv2
session security if negotiated.
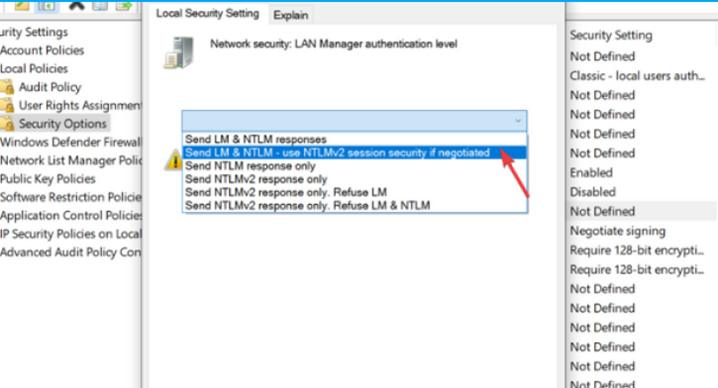
6.
Then click on Apply
and OK to save the changes
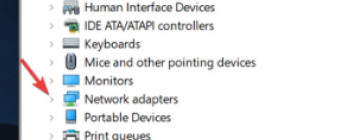
8. Reinstall your PC’s
Network adapters
1.
Right-click on the Start button
and select Device
Manager.

3.
Locate and expand Network adapters
. 
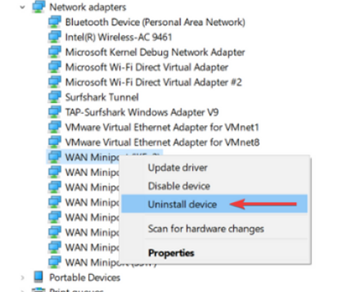
5.
Reboot your PC and check if the error persists
9. Use the Local Group Policy Editor
9.1 Enable insecure
guest logons
1. Go to Search by
clicking the magnifying glass from the bottom left corner
and
look for gpedit.msc
to open the Local Group Policy
Editor. 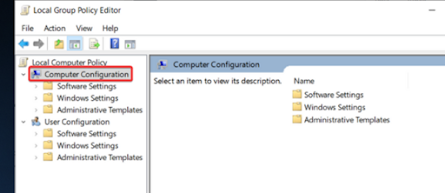
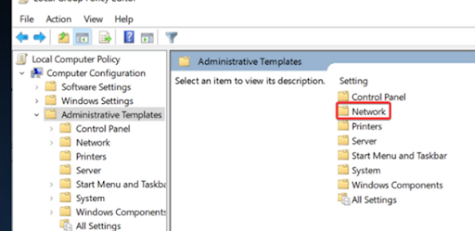
3.
Double click on Administrative Templates.
4.
Now click to open Network.
5.
Locate the Lanman
Workstation and click to open it. 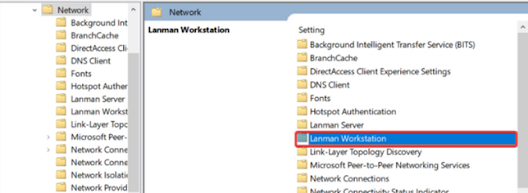
6.
Double click on Enable insecure guest logons.
7. Select the Enabled option to allow insecure guest logons to an SMB
server.
8.
Click on Apply,
then on OK to save the settings
Keep in mind that,
when enabling this policy setting, the SMB client will allow
insecure guest
logons, meaning it will let unauthenticated access to shared
folders.
9.2. Disable the
Microsoft Network client
1. Now go back to Local Computer Policy > Computer Configuration, only
this
time choose Windows settings.
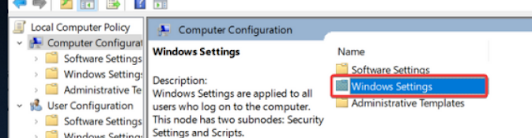
2.
Double click on Security Settings.
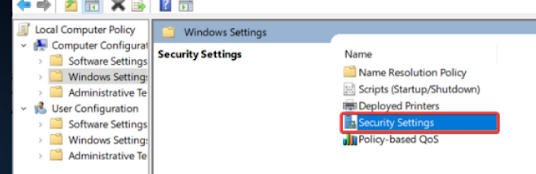
3.
Open Local Policies.
4.
Go to Security
Options and
double-click it to open.
5. Locate the Microsoft Network client: Digitally sign
communications(always) option.
6. Right-click on
it, select Properties and in the newly opened windows select
Disabled as shown below.
7.
Click Apply and then OK to save the settings and close the window.
1. Click the Start button, then type Control Panel into the search box in the
Start menu.
2.
Open Control Panel and click on View by > Large
icons.
3.
Go to Credential
Manager.
4.
Click on Windows
Credentials.
5. In the Windows Credential section, remove all the credentials and
restart the system.
6. After
restarting, go back to the same page and click on Add a Windows
credential.
8.
Click on OK to save the
settings.
11. Check TCP/IP
NetBIOS Helper service
1. Go to Search,
as decribed above, type Services, and open it from the list
of
the results.
2. Navigate to TCP/IP NetBIOS Helper.
3.
Right-click on it and open Properties.
4. Under the Startup type section, select Automatic and confirm changes.
5.
Restart your PC and look for changes.
This service should
be enabled to permanently run with the system, but there
are reports that it
stops after critical system changes imposed by Windows
Updates.
12. Enable
NetBIOS
1.
Press Windows key + R to summon the Run elevated command-line.
2. In the command-line, paste NCPA.CPL and press Enter .
3. Right-click on
your default network and open Properties.
4. Go to Internet Protocol Version 4 (TCP/IPv4) and click on Properties
below.
5.
Click on Advanced.
6.
Select the WINS tab.
7. Click on Enable NetBIOS over TCP.
8.
Confirm changes by clicking OK.
Finished
13. Reset Windows 10
Update components
1. Go to Search,
as previously mentioned, look for Command Prompt and
click
on Run as
administrator.
2. Now,
type in the following commands and press Enter after each one:
net stop
wuauserv
net stop
cryptSvc
net stop
bits
net stop msiserver
3. The
next thing we’re going to do is renaming the SoftwareDistribution and
Catroot2
folders by typing the
commands below in the Command
Prompt. Make sure to press Enter after each command you type:
Ren
C:WindowssoftwareDistribution
SoftwareDistribution.old
Ren C:WindowsSystem32catroot2 Catroot2.old
4. And finally, we’ll
conclude the process with restarting the BITS,
Cryptographic, MSI
Installer, and Windows Update Services:
net stop wuauserv
net stop cryptSvc
net stop bits
net stop msiserver
5. Now, close the
Command Prompt and restart your computer.
This workaround is
resetting the Windows 10 update components. As the
name says, this is
an assemblage of components that basically makes
downloading and
installing Windows updates possible.
So, if we reset
these components, there’s a good chance we’ll resolve our
update
problem.
1. Once again, go
to Search, type Command
Prompt and click on Run as
Administrator.
2. Type in the following command and press Enter :
sfc/scannow
3. Wait for the
process to finish, as it will take some time.
4. Restart your
computer.
15. Whitelist Windows
Update servers
1. Click the Start button, then type Control Panel into the search box in
the Start menu.
2.
Go to Control Panel and select Network & Internet.
3.
Click on Internet
Options.
4. Head over to the
Security tab from the upper menu of the Internet
options
window.
5.
Select the Trusted
Sites option
from the Security
window.
6.
Click on Sites.
7. Uncheck the Require server verification (https:) for all sites in
this
zone feature.
8. You will now
have a box there that says Add this
website to the zone.
Type
in the following addresses:
9.
Click the Add button after you
typed in the addresses above.
10.
Save the settings and restart your computer.
16. Run DISM
1. Open Search by clicking the magnifying glass from the bottom left corner,
then type Command Prompt, and click on Run as an
administrator to
open it.
2.
2. In
the command line, copy-paste these lines one by one and press Enter
after
each:
DISM /online /Cleanup-Image / ScanHealth
DISM /Online
/Cleanup-Image /RestoreHealth
3.
Wait
3. Wait until the
procedure ends as it might take up to 10 minutes.
4.
Restart your PC.


